Tuesday, February 10, 2015

Wood Heart with feelings!

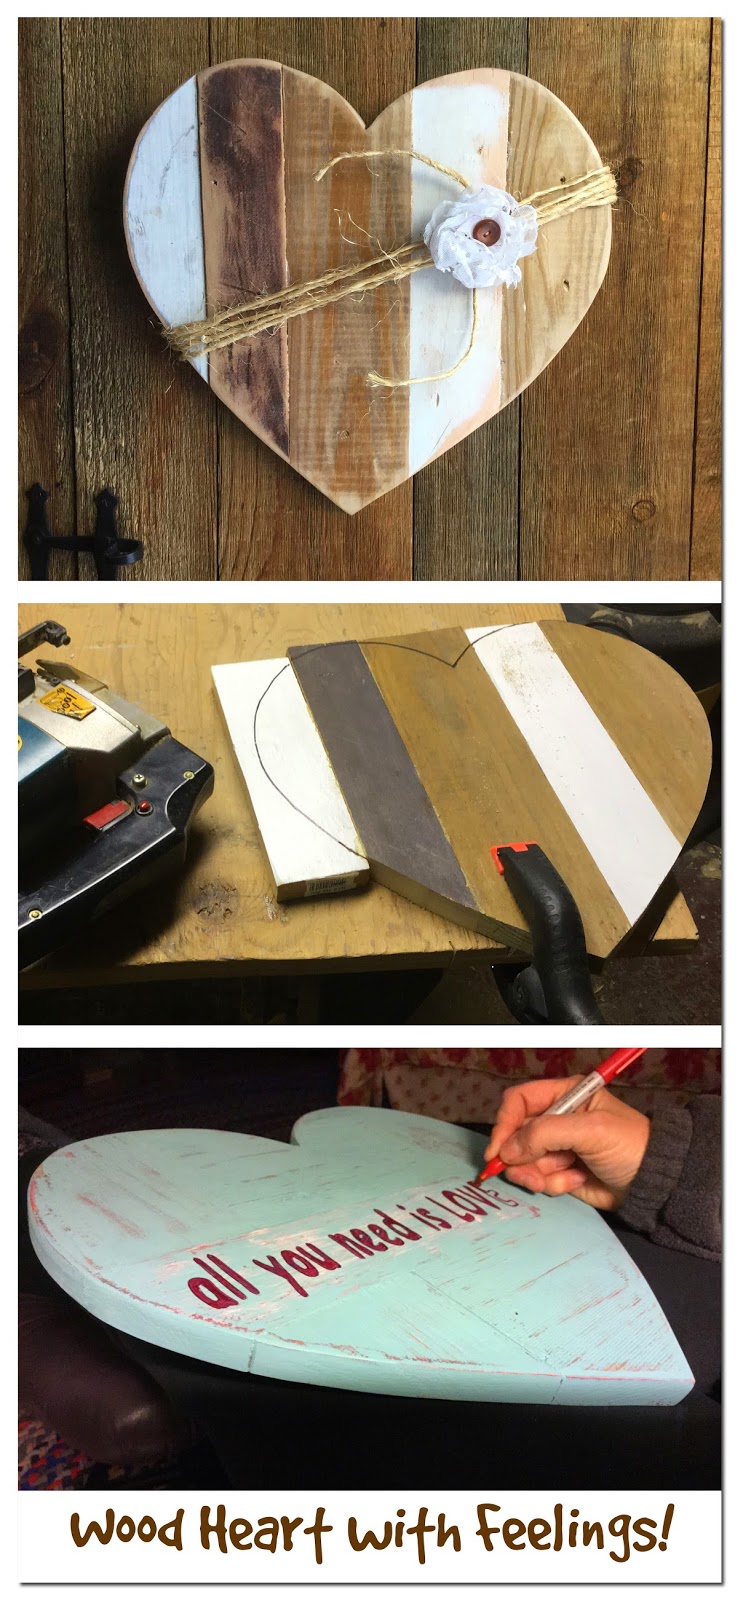
In an attempt to use up piles of assorted scrap wood, I created these wooden hearts. I searched the web for ideas (as usual), tried a few different designs and decided that the vertical board heart was my choice. I love the five board vertical heart complete with twine and a button flower!


I started by finding a heart pattern that I liked. Not a long narrow one, but a big, fat heart that was at least 12" high and wide. I experimented with a few slightly different sizes but the one I use now is 12 1/2" high and wide.  Big enough to stand out if hung on a wall or door, yet not so big that I could sell it at a reasonable price. It also fits into a USPS standard box, since boxes can add quite a bit to the cost of selling.  


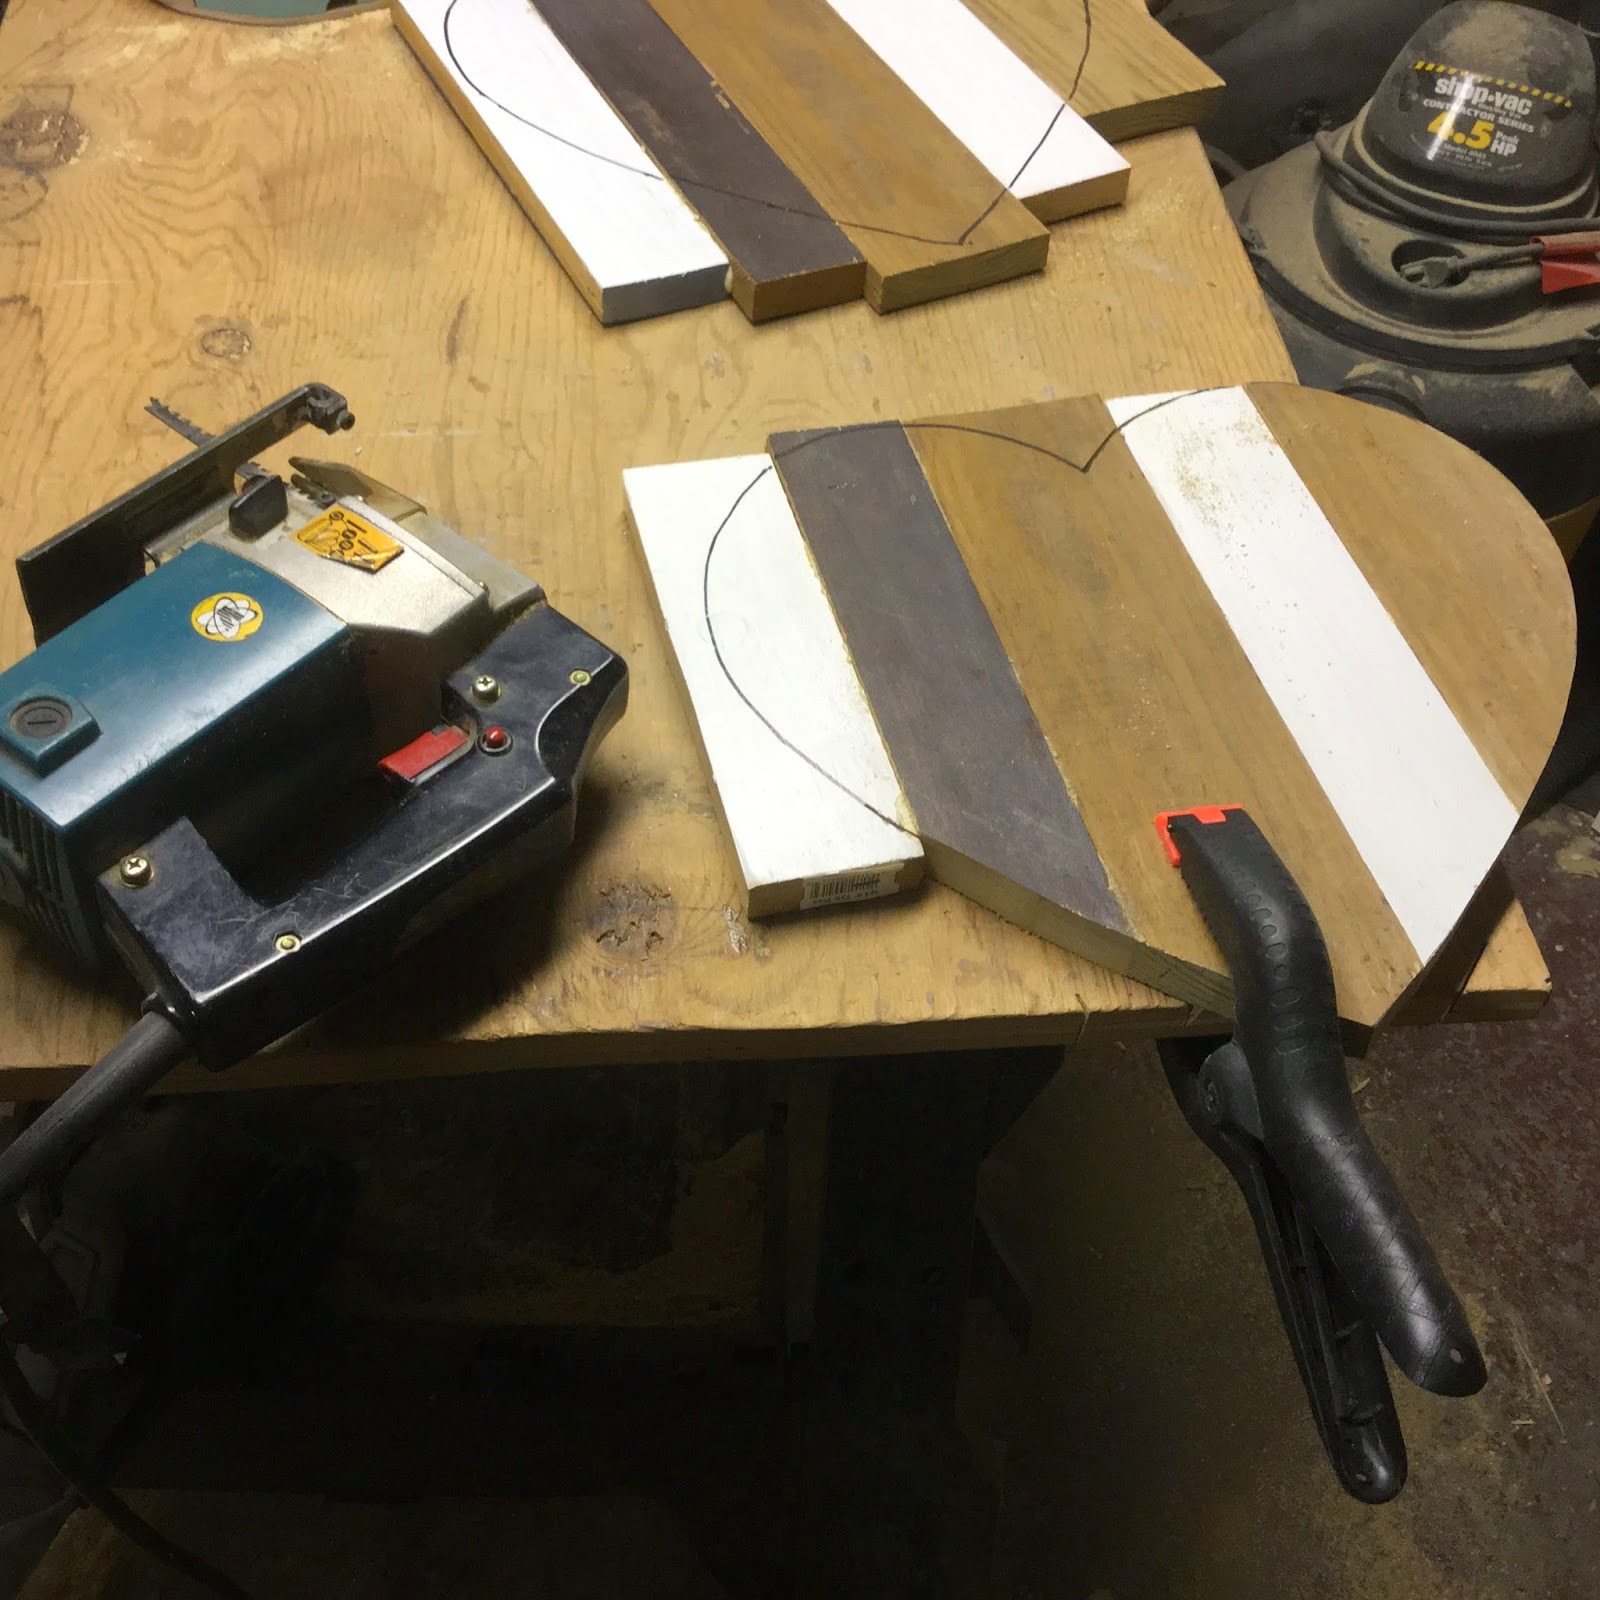
Next I laid out the boards side by side in a vertical pattern, then glued and clamped them together. After letting the glue dry overnight, I traced the heart shape. Phew, it's exciting to see the hearts take shape!


 I used my jig saw to cut out the heart pattern, clamping it to my work table.  


 Next, I lightly sanded all over trying to smooth out any rough spots and to add a "worn" look.


I don't trust the glue 100% so I cut out a rectangle from 1/4 lauan, made sure it spanned all the joints then glued it to the back.  I nailed a sawtooth hanger on the back and it was ready to hang.  I'll be adding more information and pics to this post.


Some four board hearts, I'm trying out some various wood treatments.


Friday, May 9, 2014

Fence Picket Planter


Here's another wonderful planter from Ana White.  I thought, "hey, I can make these!" So off I went to search for the lovely cedar fence pickets, 1/2" thick x 4.5" wide x 6' long.  I liked the idea of using cedar, it weathers beautifully, it's safe to handle and it has a smooth paint-able surface.  I don't like to plant herbs or anything edible in pressure treated wood.  I could not find the cedar pickets at either of the big box hardware stores, but I did spot pressure treated pine pickets at one of them.  I was itching to make these planters so I bought six of them.

I cut two boxes out together with my miter saw.
The boxes measure 20" long x 6.5" wide x 5.5" high, large enough for three 5" pots. You can download the printer friendly instructions, HERE.  I started to assemble the box but the parts didn't seem to fit correctly! I finally realized that the cut list that I used was for 1/2" cedar but my pressure treated pine measured 5/8" thick. Oops! I made it work and will keep this for myself. I used exterior liquid nails in a caulking gun plus exterior 1 1/4" screws to assemble.

Using exterior liquid nails is easy & less messy!
I proceed to make two more boxes, and they went together easily. I'm going to make a few more but bought some 1 1/2" galvanized finishing nails to assemble them.  Using Word, I printed out the words "HERB GARDEN" using outlined text. After printing it out, I used carbon paper to transfer the words to the box. Next I filled in the letters with a paint brush Sharpie pen. It didn't turn out great because the pine was still a little rough. Boy, I wish I had the smooth cedar pickets. I did a quick white wash with white DecoArt Patio paint. I added handles that I had in my stash box, and will add some rope handles to the next ones I make.

Easy to add the lettering!

Love the fork & spoon handles I saved from an old birdhouse.

Great spoon handle!


Black iron knobs on both ends.
Rope handles work great, too. Drill holes larger than rope diameter.


I saw another post HERE for a tapered planter using just half of the six foot cedar picket. Oh, I just had to try it with my last picket. It was a little difficult to match the sides when assembling because my pressure treated pine pickets weren't perfectly straight. I chose to predrill the holes then use the screws, it was easier to build. I wrote "BLOOM" on the front and installed rope handles. Next, I filled it with soil and planted a flower. It's now on my front steps!  I still had three feet of wood left and decided to make a smaller planter with straight sides. I'm on a roll . . .

Another 1/2 size, a gift for my daughter.

More gifts . . . complete with potting soil and seed packets!


Thursday, April 24, 2014

Wooden Toolbox Totes

So many uses and great as a gift.
My inspiration came from a site called "Funky Junk Interiors". Donna had posted numerous styles of creating these popular wooden toolboxes.  I got the bug to try it when a woman, Jennifer Lewis, posted complete directions and lots of detailed photographs. You can download directions are HERE.

Sides & bottom nailed together.

Cutting the "dog-eared" end pieces.
 My first box was a struggle but oh, what fun! I  had a miter saw to work with so my pieces couldn't exceed six inches wide or I'd have to cut them another way. I don't have a table saw and a jig saw cut just wouldn't be straight. My 1x6 pine pieces worked  great. Assembling the box was a struggle but I finally developed a method of clamping that worked just right.

Sanding the box before the handle goes on.
An old cane gets re-purposed as a handle.
An old gentleman from Northfield, CT made hundreds of canes. He also played the fiddle as well as constructed them. A group of us would take a ride to his house and visit him with our instruments. Roger Curtis was a wonderful man and all of us would play some great music together. He wouldn't let us leave until we went on his porch to take home a few of his hand made canes. Mr. Curtis passed away just before his 100th birthday.  So this toolbox that I'm making for a fiddler friend, who was close to Mr. Curtis, sports a handle made from one of his canes. He had carved the date and his initials in each one, which is visible in the next picture.

 
Cane made by Ronald F. Curtis 1998 is re-purposed into a handle.
I finished this toolbox with a light coating of tung oil. I hope she likes it!  I've made quite a few different ones, varying the size, color, height, handle, etc. Here's a few pics.

This is mine! Turquoise my favorite color these days.

Added a space for a message with chalkboard paint.
Taller box - great for a wine tote. The handle from a broken chair.
Beautiful blue for plants, wine, books, flowers or whatever.
Utensil tote for the kitchen.

Monday, February 10, 2014

Jeremy's Beer Tote


Beer Tote with opener.


Here's another idea using the basic toolbox shape. Size it to fit a six pack of beer! Of course soda, water, wine coolers & other drinks would fit as well. I saw many of these on Etsy, some more elaborate than others but selling in the range of $30 - $70. Of course, I pondered, I can make this for my nephew Jeremy. His birthday was coming up in March and this would make a great gift.

I had a lot of very hard pine left over from a "This End Up" couch that I had taken apart. I used that wood for the sides and bottom, drilling holes for the screws. I think I like nails better, but it's done and I don't think Jeremy will mind.  This assembled just like the other wood totes I had made previously. I even used an old broom handle that belonged to my dad (Jeremy's grandfather).  I looked for the opener at a few local package stores, but no luck. I ordered them from Amazon.  Happy Birthday, Jeremy!

Built-in opener.

Friday, December 13, 2013

Faux Fireplace

Faux Fireplace

I'm excited to say that most of the work is done on my faux fireplace that I've been building. I've got one coat of paint on and haven't decided yet what to use for the finish coat. I painted the bare wood with one cup of "swiss coffee" flat paint and 2 tablespoons of plaster of paris.  I don't have great carpentry skills, but I'm good at figuring things out and following directions. Always have. I was the kid who cut up the cereal boxes and made the Captain Kangaroo craft projects.

I found this plan on Blue Roof Cabin where Mimi did a wonderful job explaining how she built hers. The pdf plans are available from Ana White.  Give it a try if you like projects and have a wild handy streak. I just love mantels and wanted one before Christmas.

Here's how I got started:
Hauling the lumber home!

My only space big enough to lay out the boards. I used glue, lots of glue!

 I glued, then clamped. I found that I didn't use very many nails, the glue is strong.

 In retrospect, I wish I had bought a higher grade of pine. I had a lot of knots and imperfections. One of the vertical boards (on the left) developed a slight crack. No worry, I got out the glue and clamps. This photo shows the final boards going on, along with wood putty then sanding.

One of the most difficult parts was cutting the miter for the crown molding. 
This side came out great but the other side needed a lot of putty.

Monday, October 14, 2013

Fun with Chalkboards

I always loved the pictures of people that used a chalkboard message. I was finally inspired to build one with some old fence wood from this tutorial Reclaimed Fence Projects. I had never tried using the spray chalkboard paint, it seemed  like a great idea but I was never quite sure how it would work. Well, let me tell you, it's easy, effortless and works wonderfully. I wouldn't hesitate to use it on any surface.

Old frame without glass! Re-use it as a chalkboard.
My first attempt was using an old frame that didn't have the glass anymore. I painted the frame to freshen it up. Next I cut a piece of 1/4" plywood to fit the opening. Next I sprayed with chalkboard paint and let it dry overnight. The next morning I put a final coat on. After letting that dry, I followed the directions to rub chalk all over the board to "prime" the board, then wipe it clean. I nailed the chalkboard to the frame using brads and also some glue.

 Fun with a larger chalkboard.
 Ok, now I was ready to use some old wood to make a frame. This worked out great! The easy method of nailing and gluing  the board to the back of the frame was so quick and effortless. No need to miter corners or worry about using a router.  I decided to just leave this larger one unpainted, I ran out of time before my granddaughter's birthday party.

The ideas are unlimited!

Wednesday, June 19, 2013

Dear Photograph

I'm in love with the concept of "Dear Photograph".  Ever since I've known about this photographic technique of taking an old photograph and holding up in the original location, it has sparked my interest. In December of 2012, I found an old Polaroid picture of my niece and nephew sitting on the front steps, shadowed by my brother Steve's dog.  The day was steamy and hot, so they had a bucket of cold water that cooled their toes. Thirty five years later, I hold the precious picture in my left hand and balance the camera with my other hand carefully aligning the door lines. SNAP!

 
Dear Photograph,
Thirty-five years later and the sun still shines down warming the steps and hearts of this memory.
Susan